Recently we had a requirement where we needed to migrate huge amount of data stored in Azure Table Storage to Azure Cosmos DB (SQL API). We had about 225 million entities in Table Storage that we needed to migrate to Cosmos DB.
Since we did not have this functionality in our product Cerebrata and considering a lot of folks will be needing this feature given the numerous advantages of Cosmos DB over Azure Table Storage, we thought it would be better if we first build this feature in Cerebrata and then perform the migration.
In this blog post we will talk about how we efficiently transferred the data from Azure Table Storage to Azure Cosmos DB using Cerebrata.
Before I talk about that, I want to take a quick moment and talk about Cosmos DB support in Cerebrata.
Cosmos DB support in Cerebrata
Cerebrata provides most comprehensive support for managing resources in your Azure Cosmos DB accounts. Some of the features supported by Cerebrata are:
- Support for SQL API, Gremlin API and Table API
- Support for databases, containers, items (documents, graph, entities), stored procedures, triggers, user defined functions and users.
- Copy items (documents and entities) from one container to another container in same or different Cosmos DB accounts. Cerebrata enables you to copy selected items, all items matching a query or all items in a container.
- Download items (documents and entities) from a container.
- Basic account management capabilities etc.
Check out the complete list of features of Azure Cosmos DB.
Migration Tips & Tricks
Now coming to the things we did to migrate 225 million entities from a Storage Account Table to a Cosmos DB Container. We modified the application code as we did the migration to improve the performance of the migration. In our first attempt, Cerebrata took about 55 hours to do the migration. After the improvement, Cerebrata took about 20 hours to migrate the same data!
So here are the things we learned.
1. Co-locate your resources
First thing you would want to do is co-locate your resources. In our case, the Storage account and the Cosmos DB account are in the West US region. We created a VM in West US region only and installed Cerebrata in that VM. We went with a 8 vCPU and 32 GB RAM VM.
The benefits of creating the VM in the same region as that of Storage and Cosmos DB accounts are:
- Reduced latency: No matter how great internet speed you have on-premises, you will still encounter some latency when fetching data from and pushing data in Azure. With the VM running in Azure in the same region, we have reduced that latency considerably. Though it’s an apples-to-oranges comparison but when we ran Cerebrata from our local computer to do the same task, we were getting a throughput of about 200 documents/second. Doing the same in Azure, we got a throughput of 2000 documents/second!
- No Egress charges: This is another benefit of using resources in the same region. Considering our Storage account, Cosmos DB account and the VM are in the same Azure region, data did not leave that region thus we saved some money on the egress charges.
2. Turn off indexing on Cosmos DB container
Before starting the migration process, you should turn off the indexing on your Cosmos DB container. By default indexing is turned on for all attributes of a document in you container and you can fine tune the indexing but when you are migrating a large volume of data, it’s better to turn off indexing completely so that you’re not wasting any request units for indexing that data and all allocated request units are available for the migration process.
Cerebrata makes it super easy to set indexing policies on a container. Simply view the container indexing policies and set the “Indexing Mode” to “None” as shown below.
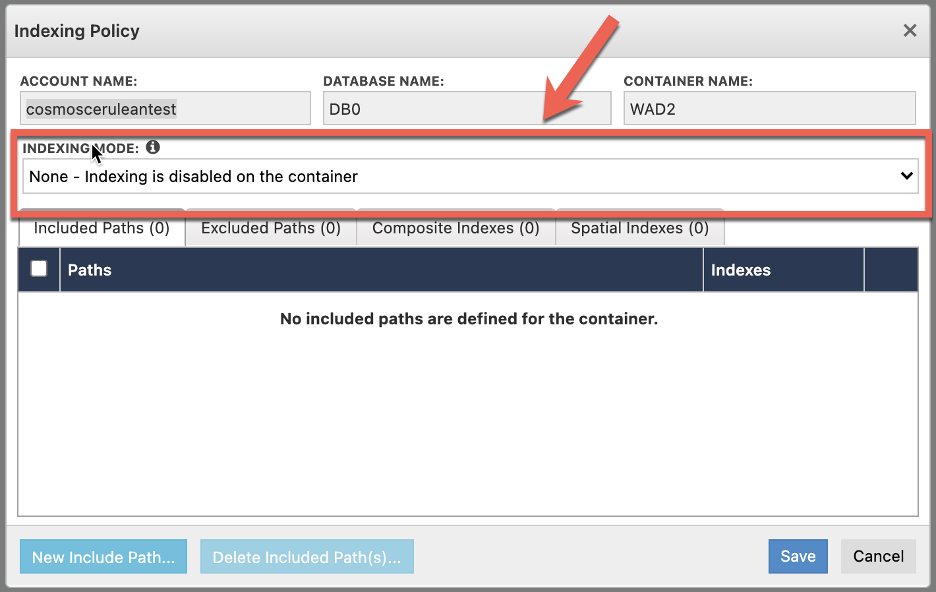
This will ensure that the ingested data will be not be indexed as it gets saved in your Cosmos DB account.
Please do not forget to set appropriate indexing policy once the data is migrated!
3. Allocate enough throughput (RU/s)
One of the advantages of using Cosmos DB is that it gives a really fine-grained control over how much throughput you want. When creating a container you can specify if you want the container
- To have a fixed throughput;
- To have a variable throughput; or
- To share the throughput of the database (in case the throughput is defined on the database).
Again, Cerebrata supports all these three options as shown below.
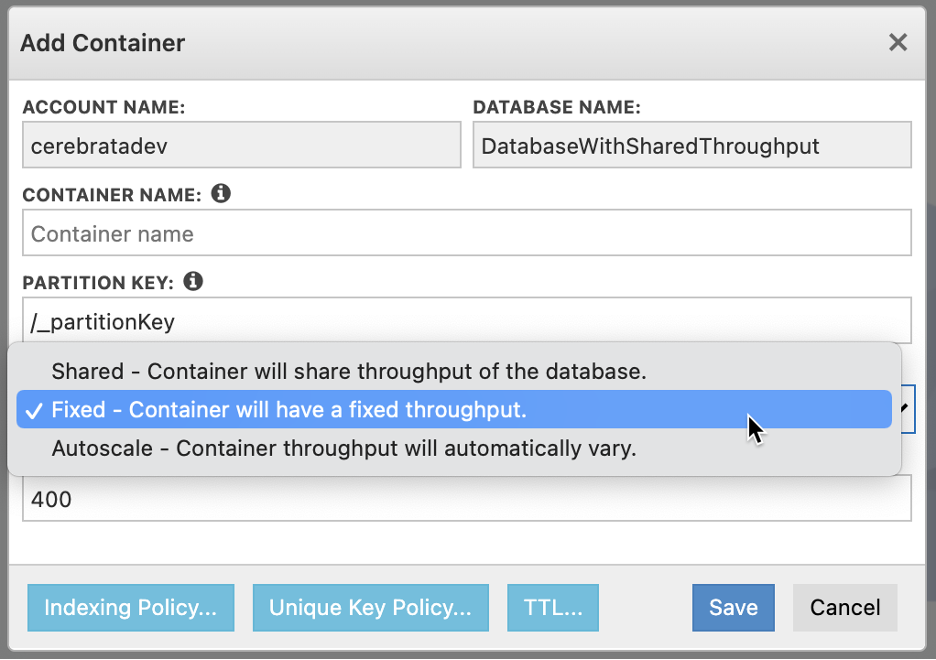
Please do keep in mind that once the throughput type (Shared, Fixed or Autoscale) has been defined on a container, you can’t change that type. You can change the throughput value anytime though.
Again, changing throughput on a container is super easy using Cerebrata. Simply view the “Throughput” on the container and change it based on your needs. In our case, we configured the container to have “autoscale” throughput and we went with a maximum of 75000 RU/s with 10% increment percentage so that we would get the throughput of anywhere between 7500 and 75000.
You may be tempted to keep a lower throughput but that would result in a lot of your requests getting throttled and that would delay the migration process considerably. In fact, we started with lower throughput (max 10000 RU/s) and encountered considerable throttling errors. In our final run, we ended up using 75000 RU/s.
4. Choose “Inserts” over “Upserts”
Difference between an “Insert” and an “Upsert” operation is quite simple. An “insert” operation will try to create a document and if that document exists, the operation will fail with a conflict (409) error code. Whereas an “upsert” operation will try to create a document and if that document exists, it will simply be updated.
While working on this functionality in Cerebrata, we had great help from Cosmos DB product team members and they recommended to use “insert” operation over “upsert” as an “insert” operation is cheaper in terms of consumed RU/s than an “upsert” operation.
The above statement is true only if the document you are trying to create is already present in the container. If the document is not present in the container, then the cost of “insert” and “upsert” operation is the same.
Cerebrata supports both “insert” and “upsert” operation and with a simple click you can toggle between an “insert” and “upsert” mode for creating documents as shown below.
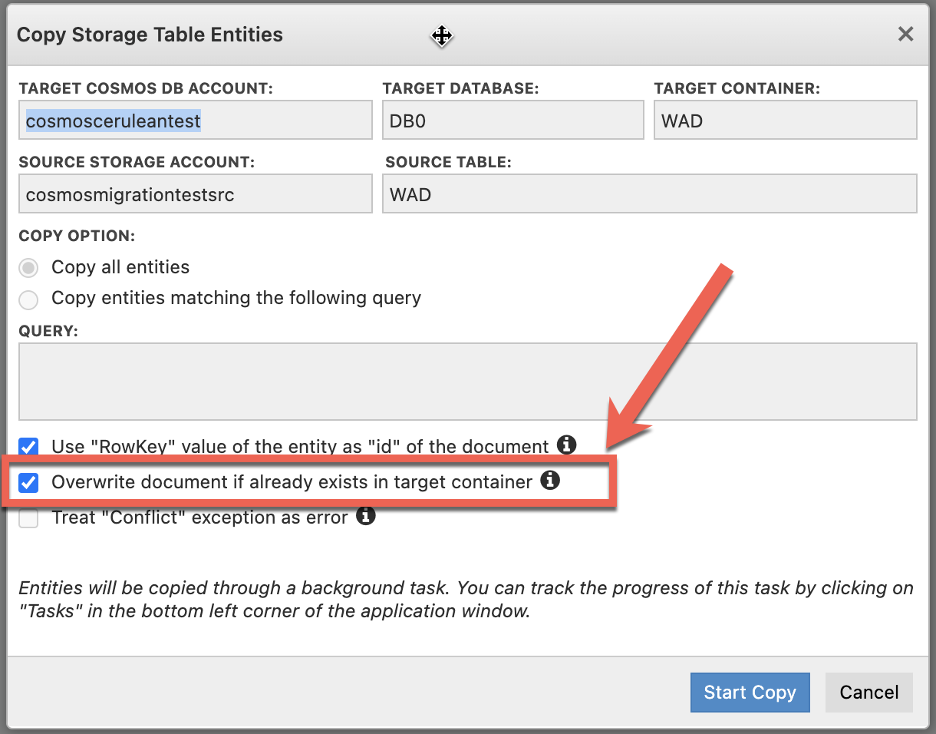
Simply unchecking the checkbox which reads “Overwrite document if already exists in target container” will switch the mode from “upsert” to “insert”.
5. Handle “Throttling” errors
You encounter throttling errors when your requests consume more RU/s than the allocated. These are transient errors and if you’re writing code to do the migration, you should handle these errors and retry creating the documents failed because of this reason.
Cerebrata is designed to handle these throttling errors and will retry creating the documents that have failed because of this error.
6. Bulk Uploads
Cosmos DB SQL API has this feature wherein you can create multiple documents in a single request to Cosmos DB service. Instead of sending individual requests to create single documents, you can combine up to 100 documents (with same partition key value and the total size of less than 2MB) and create those 100 documents in a single request.
Again, Cerebrata does this for you by making use of this functionality to achieve higher throughput. It automatically groups the documents that needs to be uploaded in batches of 100 documents each and then uploads the batches.
7. Parallelize Operations
This, by far, was the most significant thing we did. So the process for migrating from Storage Tables to Cosmos DB Containers is fairly straightforward:
- Fetch entities from the source table (1000 entities/request)
- Convert entities into documents.
- Create document batches (maximum of 100 documents/batch).
- Upload each batch individually.
- Check if more entities are available by checking for the presence of continuation token in fetch entities response.
- If more entities are available repeat the process otherwise terminate the process.
In the first build of Cerebrata for this functionality, we followed this approach. While we were able to create 225 million documents successfully, it took close to 55 hours to accomplish this! That was simply unacceptable.
Then we changed our code and instead of uploading the batches individually (step 4), we uploaded them in parallel. The result was phenomenal! We were able to create those 225 million documents in less than 20 hours!!! That gave us an average throughput of about 3000 documents/second.
Azure Cosmos DB management – Perform CRUD operations on databases, containers, items and advanced operations like sophisticated query manager, bulk operations, transfers with Cerebrata.
Summary
That’s it for this post. We hope that you have found this post useful. You can use this guidance to write some code or you can simply use Cerebrata to accomplish this. Apart from Cosmos DB, Cerebrata also has support for managing data in your Azure Storage, Azure Service Bus, Azure Redis Cache, and Azure Cognitive Search accounts.
If you wish to experience Cerebreta, try our 15 days free trial.