In this post, we will see about how Cerebrata can be used to manage and maintain the data in Azure Storage Tables which is a service that stores non-relational structured data (also known as structured NoSQL data) in the cloud, providing a key/attribute store with a schema less design. The table storage functions on three different parameters such as tables, entities and properties.
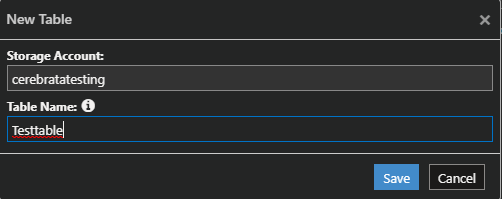
Creating New Table
Cerebrata offers the functionality to create a new storage account table from the application with any of the connected storage accounts. You can simply select the plus (“+”) icon in the storage account table resource where a new popup window will be opened prompting for the new storage storage account table name so, you can specify the friendly name and create a new table container.
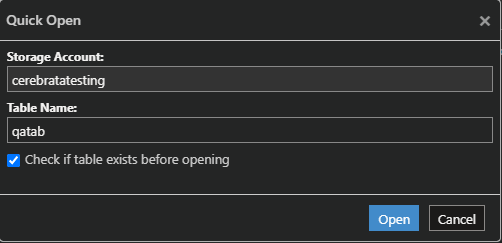
Quick Open
If you have many tables in your Storage account but you know which table you want to work with, Quick Open functionality in Cerebrata can help you. With this functionality you can simply type the name of the table that you want to work with and the application will open that table for you.
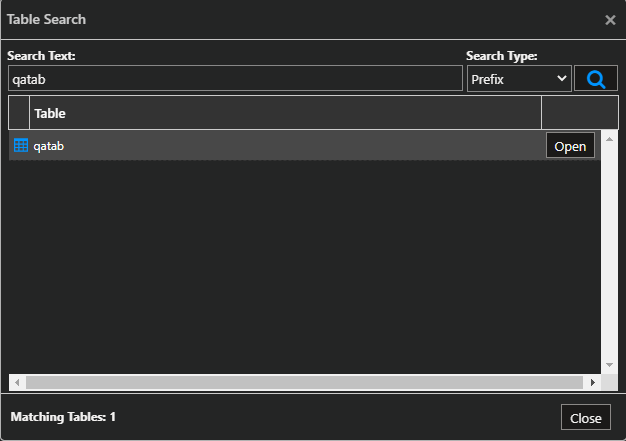
Search Table
If you have many tables in your Storage account, scrolling through the list of tables to find desired tables can be cumbersome. Search table functionality in Cerebrata helps you find tables quickly. You can perform both “prefix” and “contains” search where the former searches for tables names of which start with the search text while latter performs searches for tables names of which contain the search text.

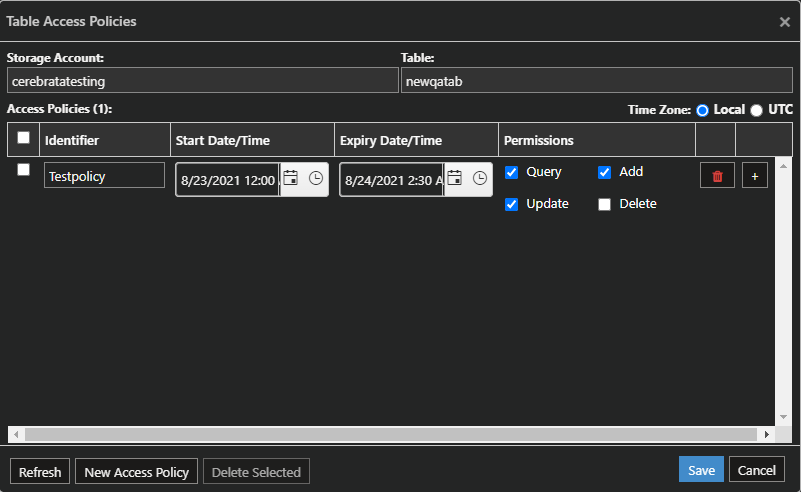
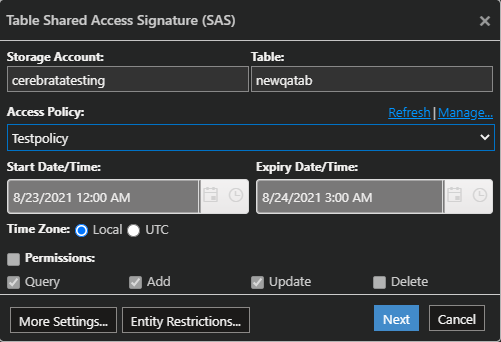
Access Poilcy
Cerebrata allows you to define the Shared Access Policy which provides an additional level of control over service-level Shared Access Signatures (SAS) on the server side. Establishing a stored access policy serves to group shared access signatures and to provide additional restrictions for signatures that are bound by the policy. You can create and update a new access policy inside the application where you can specify the identifier (friendly name) along with the start and expiry date and time. You can also specify the permission for the access policy like (query data, add, update or delete data) permissions to the respective identifier. A maximum of 5 policies can be created.
Shared Access Signature
The Shared Access Signature functionality enables you to create Shared Access Signature (SAS) tokens for your tables so that you can give permissions-drive and time-bound access to your tables to other users without sharing your storage account key.
Cerebrata makes it super simple to create SAS tokens. You can create both ad-hoc and access-policy bound SAS tokens.
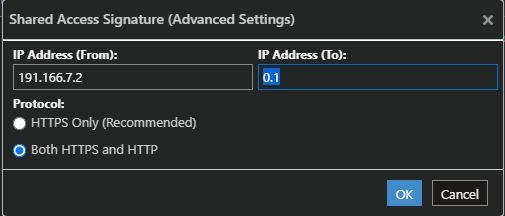
You can also restrict the usage of your SAS token by IP address as well as request protocol (HTTPS only or HTTPS/HTTP).
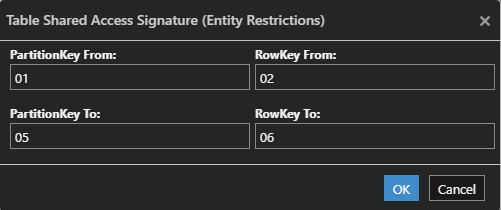
You can further restrict access to only certain PartitionKey/RowKey ranges so that the user who has access to a SAS token can only access the entities within those PartitionKey/RowKey ranges.
Copy Table Entities
Cerebrata allows you to copy the table entities from one table to other table in same or different storage account. You can even copy entities from a storage table to a Cosmos DB account targeting SQL API or Table API.
Copying entities is a two step process: First you tell the application about the data you wish to copy and then you instruct the application to copy that data.
Step 1 – Prepare Data To Copy
In this step, you tell the application about the data you wish to copy. You can copy all entities from a table or specify a query so that only entities matching that query will be copied.
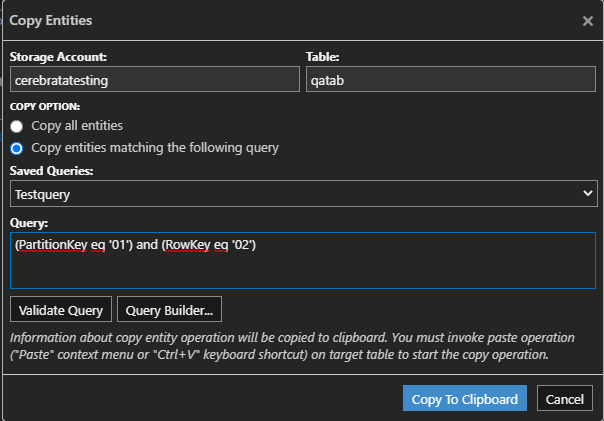
Copy all entities – This option when selected will copy all the entities from the table.
Copy entities matching the following query – This option will copy the entities which matches the specified query where you can select the desired query from the dropdown box if the query already exists.
Validate Query – The query can be written manually in the query textbox and this option can be used to validate the created query.
Query Builder – Using this option you can instantly create a new query and select that query for copying the entities.
Step 2 – Initiate Copy
In previous step we configured what needs to be copied. In this step we would initiate the copy process. To paste the copied entities, you can simply select the paste option in the context menu of the selected resource node where a new popup window opens to specify the following settings like,
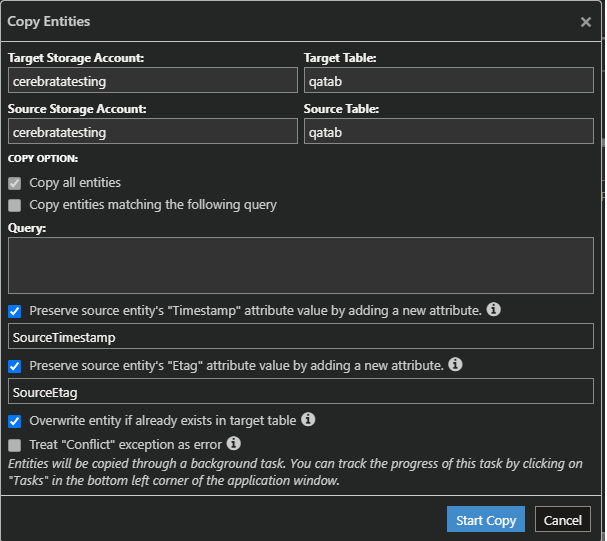
Preserve source entity’s “Timestamp” attribute value by adding a new attribute – This option will preserve the timestamp same as of the copied source entity which doesn’t gets changed when copied to a new table.
Preserve source entity’s “Etag” attribute value by adding a new attribute – This option will preserve the etag same as of the copied source entity which doesn’t gets changed when copied to a new table.
Overwrite entity if already exists in target table- This option will overwrite the entities if the seme entity already exists in the target table.
Treat “Conflict” exception as error – This option will make the particular entities to be failed in the background task when the same entity already exists in the target table.
Delete Entities
Using Cerebrata, you can easily delete entities from a table. You can choose to delete all entities from a table or entities matching a certain query.
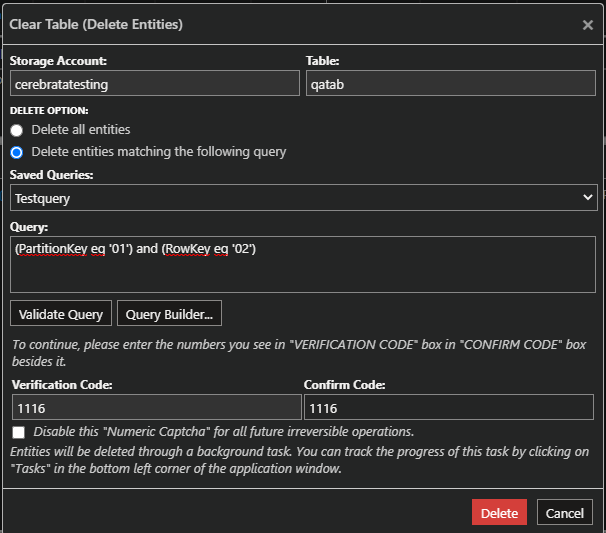
Delete all entities – This option when selected will delete all the entities from the table.
Delete entities matching the following query – This option will delete the entities which matches the specified query where you can select the desired query from the dropdown box if the query already exists.
Validate Query – The query can be written manually in the query textbox and this option can be used to validate the created query.
Query Builder – Using this option you can instantly create a new query and select that query for deleting the entities.
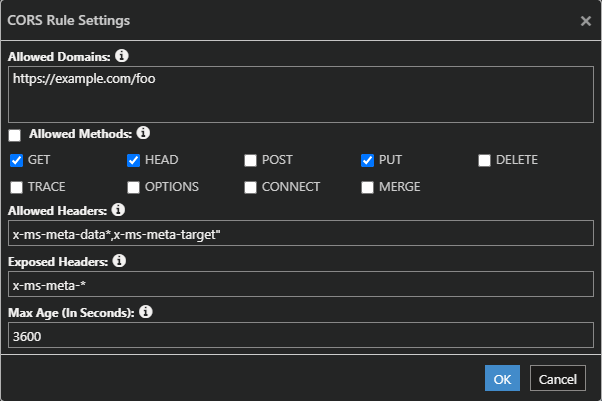
CORS settings
Cerebrata also extends it support for Cross-Origin Resource Sharing (CORS) option which is an HTTP-header based mechanism that allows a server to indicate any origin (domain, scheme, or port) other than its own from which a browser should permit loading of resources.
You can create a new CORS rule inside the application where you can specify all the Allowed Origins, Allowed Methods, Exposed and Allowed Headers and the maximum age of the the CORS rule. You can set CORS rule by navigating to the context menu of the table resource > Select CORS Settings option.
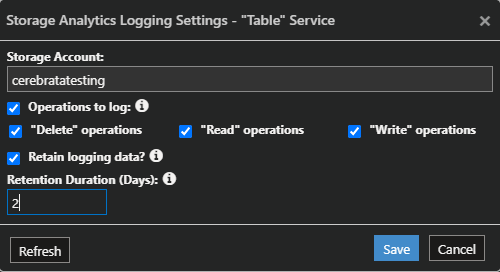
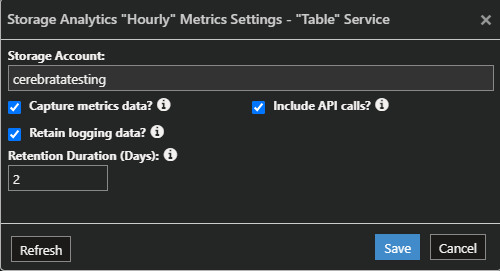
Analytics Settings
Cerebrata allows you to specify the analytics settings where you can specify the logging settings of the table along with it’s retention period and the type of operations to be logged. You can also specify the hourly and minute metrics settings along with their data retention period. To specify this settings you can simply select the analytics settings in the context menu of the table resource.
Conclusion
In this blog, we saw how easy it is to manage your Azure Storage Tables using Cerebrata. Apart from Storage Tables, you can also manage Storage Blobs, Files and Queues using Cerebrata as well.
Cerebrata also enables you to manage your Azure Cosmos DB accounts (SQL API Table API), Service Bus Namespaces, Cognitive Search Service accounts, Redis Cache accounts, and much more. It is also cross-platform so that you can manage your Azure resources from a platform of your choice – Windows, Mac, or Linux.
If you wish to experience Cerebreta, try our 15 days free trial.